ArtStar uses three types of installation hardware depending on the type and size of your frame. Below is a helpful guide to help you install your new piece of art.
FOR SMALL FRAMES
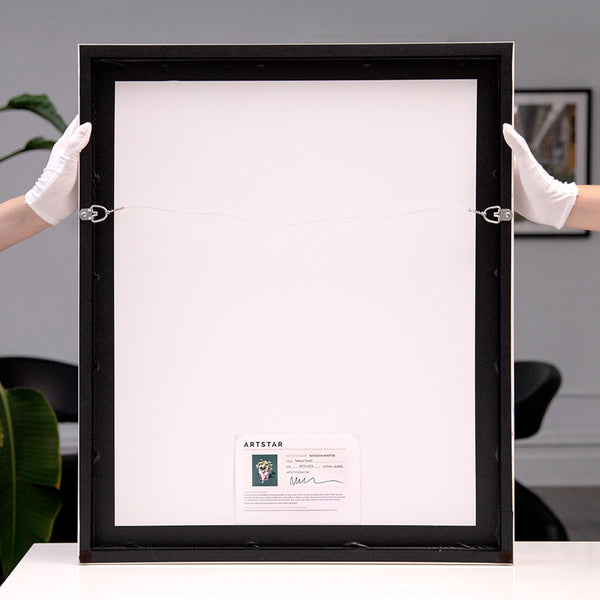
For frames 20 x 24 inches and under, we use a wire backing.
TOOLS NEEDED
Hammer, picture hangers, level
HANGING RECOMMENDATIONS
Attach two picture hangers to the back of the frame at the same level, and place the wire on top. Using two picture hangers keeps the frame level and prevents it from shifting over time.
FOR LARGE FRAMES
For frames over 20 x 24 inches, we use D rings to evenly distribute the weight on both sides of the (heavy!) frame and to protect the longevity of your frame. (PSA: Please do not add wires to the D rings. The hardware is not designed to be wired and will rip out of the frame.)
TOOLS NEEDED
Blue painters’s tape, level, drill, picture hangers, pencil
ArtStar is not liable for frames damaged by adding wires to our D ring hardware.
FOR FACEMOUNTED ART
For facemounts, we use an easy-to-install metal plate and cleat system that redistributes the weight of the artwork across a large portion of the wall — and that won’t shift if bumped.
TOOLS NEEDED
Level, drill, screws
HANGING RECOMMENDATIONS
Place the loose plate on the wall, with the holes flush to the wall. Use a level on top of the plate to ensure it is level to the wall, before then drilling screws into the holes on plate. Lift the art so that the cleat attached to the back of the frame goes on top of the plate attached the wall. Drop down or position the art to lock the plate and cleat together into place. Center art with level.